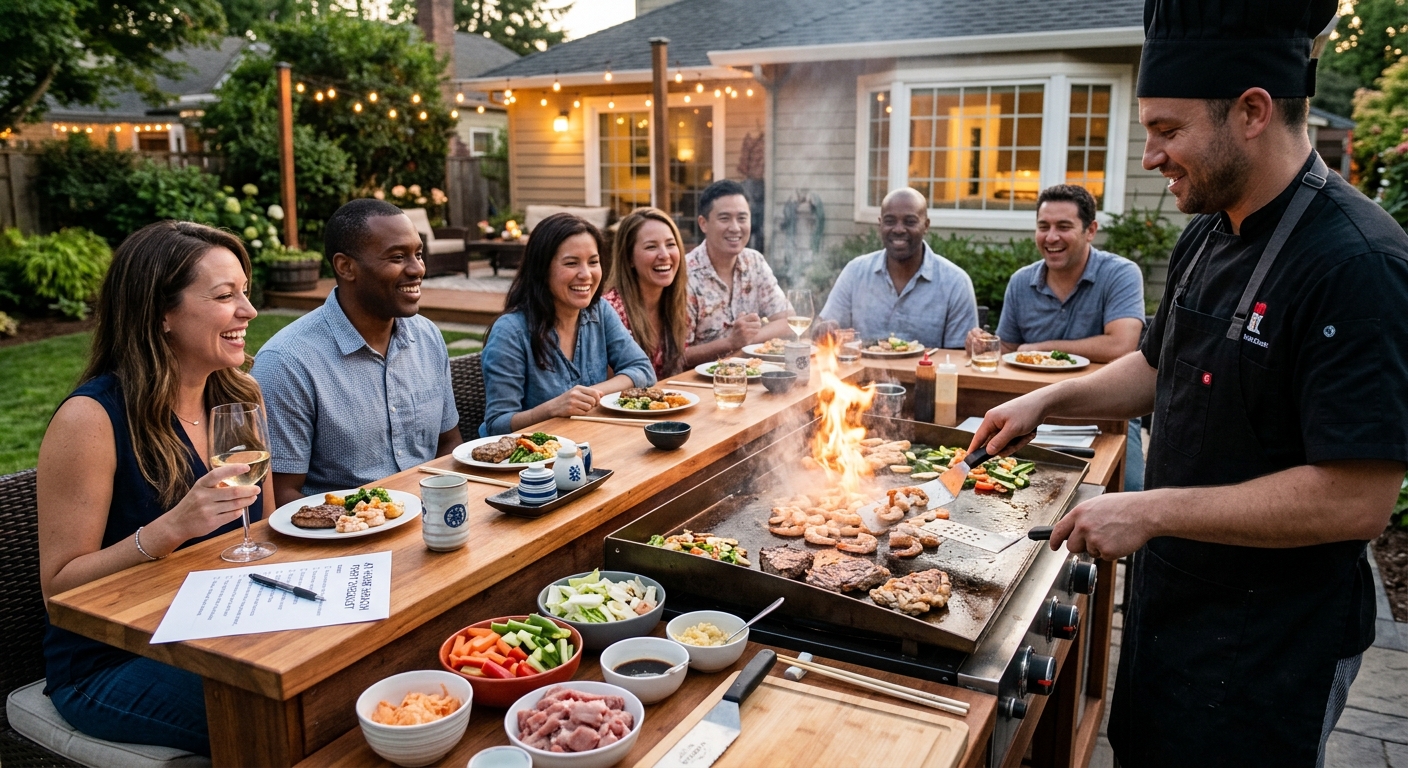
Introduction to At-Home Hibachi Parties
Hosting an at-home hibachi party has become a highly sought-after culinary experience, blending the excitement of interactive dining with the comfort of your own backyard. Unlike traditional dinner parties, a hibachi gathering centers around the grill, where the cooking process itself serves as the main entertainment. Whether you are celebrating a special occasion, hosting a corporate team-building event, or simply looking to elevate your weekend gathering, meticulous preparation is the key to a seamless and memorable event.
Because hibachi requires precise timing, specific equipment, and an array of fresh ingredients, having a comprehensive checklist is non-negotiable. As the host or designated chef, your goal is to recreate the theatrical flair of a professional Japanese steakhouse while ensuring food safety and guest satisfaction. This guide provides a detailed, step-by-step checklist to help you organize every aspect of your at-home hibachi party with professional finesse.
Essential Equipment Checklist
The foundation of any successful hibachi event is the cooking apparatus and the tools you use. Professional teppanyaki chefs rely on specialized gear to perform their impressive culinary feats. Here is what you need to gather before the party begins:
- Flat-Top Grill or Griddle: A large, propane-fueled flat-top grill (such as a Blackstone) is ideal. It provides the ample surface area needed to cook different components simultaneously.
- Heavy-Duty Spatulas: Invest in at least two stainless steel, long-handled spatulas. These are essential for chopping vegetables, flipping proteins, and performing classic hibachi tricks like the onion volcano.
- Squeeze Bottles: Purchase multiple squeeze bottles for cooking oils, soy sauce, water, and homemade yum yum sauce. These allow for quick, precise application during the fast-paced cooking process.
- Scraper and Cleaning Tools: A grill scraper is necessary to keep the cooking surface clean between courses, preventing cross-contamination and flavor transfer.
- Meat Thermometer: To ensure all proteins are cooked safely and to your guests' exact preferences.
- Serving Platters and Bowls: Have ample serving ware ready to distribute the food piping hot straight from the grill.
Menu Planning and Ingredients Checklist
A traditional hibachi menu is categorized into distinct courses: soup, salad, vegetables, fried rice, and the main proteins. Preparation is crucial; all ingredients must be pre-chopped, marinated, and portioned before you even ignite the grill.
Proteins
Offering a variety of proteins ensures that all guest preferences and dietary restrictions are accommodated. Standard options include chicken breast, shrimp, scallops, and high-quality beef. If you truly want to impress your guests and elevate the culinary experience, consider serving premium cuts of beef. For an exceptional main course, we highly recommend reviewing the Wagyu Steak Teppanyaki Recipe at Home: The Ultimate Guide, which provides unparalleled insights into preparing luxurious, melt-in-your-mouth wagyu on a flat-top grill.
Vegetables and Sides
Classic hibachi vegetables include zucchini, onions, mushrooms, and broccoli. These should be cut uniformly to ensure even cooking. For the fried rice, day-old long-grain white rice or jasmine rice is mandatory, as fresh rice will become mushy on the griddle. You will also need eggs, peas, carrots, and diced onions for the rice preparation.
Sauces and Seasonings
Flavor is driven by a combination of high-quality sauces and simple seasonings. Ensure your pantry is stocked with:
- Soy Sauce: A low-sodium variety is often preferred to control saltiness.
- Sesame Oil: For authentic aroma and flavor.
- Garlic and Ginger Butter: Compound butter is the secret ingredient behind the rich flavor of professional hibachi.
- Dipping Sauces: Yum Yum sauce (a mayonnaise-based sweet and tangy sauce) and a zesty ginger sauce for dipping proteins and vegetables.
- Salt and Pepper: Keep a mix in a small shaker for quick seasoning.
Setting the Scene: Atmosphere and Decor
The ambiance of your at-home hibachi party is just as important as the food. Recreating the vibrant, communal atmosphere of a teppanyaki restaurant requires thoughtful decor and seating arrangements.
- U-Shaped Seating: If possible, arrange tables and chairs in a U-shape around the flat-top grill. This ensures every guest has a front-row seat to the culinary show.
- Table Settings: Use bamboo placemats, ceramic sauce dishes, and high-quality chopsticks. Provide small, warm towels (oshibori) before the meal for guests to clean their hands, adding an authentic touch of Japanese hospitality.
- Lighting and Music: String lights or paper lanterns can create a festive outdoor atmosphere. Curate a playlist of upbeat, ambient music that enhances the mood without drowning out the chef's interactions.
- Safety Zones: Ensure there is a safe distance between the open flame of the grill and the guests, particularly if children are attending. Keep a fire extinguisher readily accessible.
Sample Hibachi Party Timetable
To keep your event running smoothly, following a structured schedule is highly recommended. Below is a sample timetable for an evening hibachi party:
| Time | Activity | Details |
|---|---|---|
| 4:00 PM | Equipment Setup | Position the grill, test the propane tank, and arrange the U-shaped seating. |
| 4:30 PM | Ingredient Prep (Mise en Place) | Chop all vegetables, portion proteins, and prepare compound butters and sauces. |
| 6:00 PM | Guest Arrival | Serve welcome drinks and a light appetizer, such as edamame or clear onion soup. |
| 6:45 PM | Grill Ignition and Heating | Preheat the flat-top grill to medium-high heat and organize squeeze bottles. |
| 7:00 PM | The Main Event: Cooking Begins | Start with fried rice and vegetables, engaging guests with spatula tricks. |
| 7:20 PM | Protein Searing | Cook chicken, seafood, and premium steaks, slicing them directly on the grill. |
| 8:00 PM | Dessert and Wind Down | Serve green tea ice cream or fresh fruit while the grill cools down. |
Conclusion
Executing an at-home hibachi party is a rewarding endeavor that combines culinary skill with engaging entertainment. By utilizing a comprehensive checklist that covers equipment, meticulous ingredient preparation, and atmospheric details, you can eliminate the stress of hosting and focus on delivering a spectacular experience. Remember that the secret to a flawless hibachi event lies in the prep work—having your mise en place fully organized allows you to perform at the grill with confidence. Whether you are an amateur cook or a seasoned home chef, following these professional guidelines will ensure your hibachi night is talked about for years to come.
Frequently Asked Questions (FAQ)
What is the best grill for an at-home hibachi party?
The best option for an at-home hibachi party is a large, outdoor gas griddle or flat-top grill, such as a Blackstone griddle. These grills provide a massive, even-heating surface area necessary to cook multiple ingredients simultaneously, mirroring the commercial teppanyaki grills used in restaurants.
How much food should I prepare per guest?
A good rule of thumb is to prepare roughly 6 to 8 ounces of protein (mixed or single choice), 1 cup of cooked rice, and 1 cup of chopped vegetables per adult guest. Always prepare a little extra to account for larger appetites and the inevitable sampling that occurs during the cooking process.
Can I hire a professional chef for an at-home hibachi party?
Yes, hiring a private hibachi chef has become a very popular service. Many companies specialize in backyard hibachi catering, where a professional chef brings the grill, food, and entertainment directly to your home. This is a great alternative if you want to enjoy the party without the stress of cooking and performing.
How do I make the famous hibachi onion volcano?
To make an onion volcano, slice a large white onion into thick rings. Stack the rings from largest at the bottom to smallest at the top to form a volcano shape. Pour a small amount of cooking oil into the center, followed by a splash of high-proof clear liquor (like vodka). Carefully ignite the center with a long lighter to create the signature flame effect.
Comments
Post a Comment